Deliciously Fun and Easy Medieval Chicken Recipe
If you’re looking for a new way to level up your chicken recipe game, then look no further. The medieval chicken in a clay roaster recipe will transport your taste buds back in time to the Middle Ages. This recipe is derived from the food of kings and queens, bringing home cooking to a whole new level.
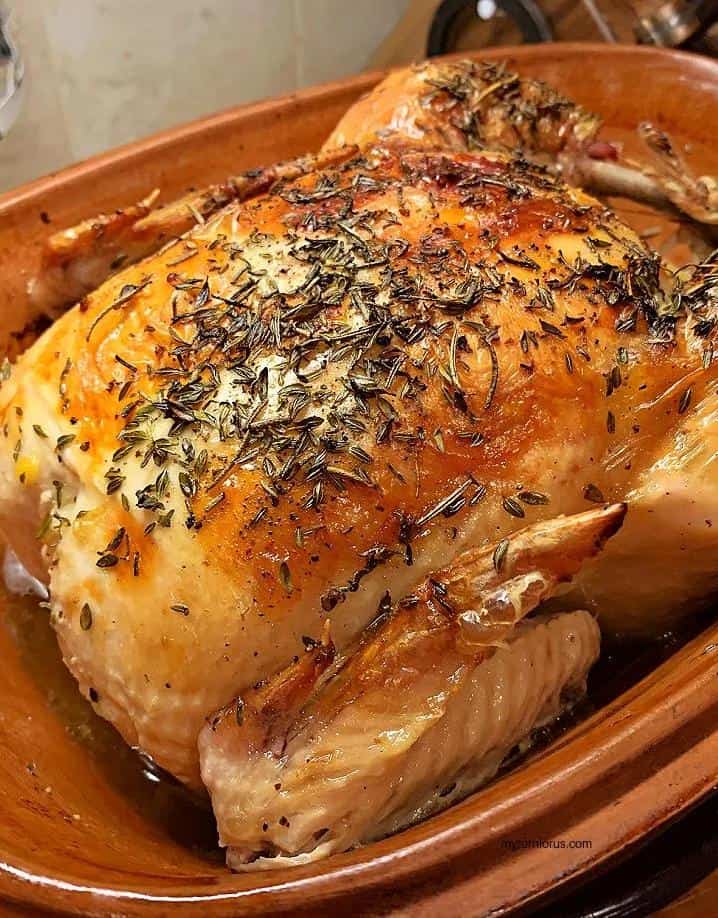
The secret to this recipe’s success is its cooking method. It’s cooked in a traditional clay pot that makes the meat incredibly tender and juicy, with an intense flavor infused by aromatic herbs like fresh rosemary. This cooking process brings you food that’s perfect for sharing with friends and family, and it’s sure to impress even the fussiest of guests.
This dish is incredibly versatile and can be served for Sunday dinner, at a party or special event, or just as an enjoyable weekday meal. You won’t need any complicated equipment or ingredients to execute this recipe successfully; all you need is a bit of patience.
This recipe represents how people cooked centuries ago when technology and supplies were scarce. Cooking was done with fire, wood and coals; things that most people today have never experienced. The medieval chicken in a clay roaster recipe brings the essence of history into your kitchen.
Are you ready to travel back in time with me and create something truly amazing? Continue reading for my detailed instructions on how to make this delicious, mouth-watering medieval chicken.
Why You’ll Love This Recipe
Are you tired of the same old basic roasted chicken? Say no more! This medieval chicken in a clay roaster recipe will change your perception of roast chicken forever.
First of all, let’s talk about the cooking method. This recipe utilizes a traditional clay pot roaster that creates an ambiance reminiscent of the medieval times. The aroma that envelops your kitchen while the chicken is cooking is guaranteed to transport you to a bygone era.
Secondly, the use of fresh rosemary, onion, and garlic cloves infuses this dish with flavor, making it tastier and more succulent than ever before. And let’s not forget about the white wine and unsalted butter that take this dish to another level.
Thirdly, this recipe is so versatile that it can be adapted to fit any dietary needs or preferences. Whether you’re looking for low-carb options or plant-based alternatives, there are endless substitutions and variations available.
Finally, let’s talk about convenience. This recipe requires minimal prep time and can be cooked in your oven at home, leaving plenty of time for party planning and enjoyment. Plus, the clay roaster ensures that your chicken remains moist and tender while minimizing clean-up time.
In summary, this medieval chicken in a clay roaster recipe is perfect for anyone looking to shake up their usual dinner routine while enjoying a delicious and flavorful meal. Trust me; this recipe will become a go-to favorite for dinner parties or simple weeknight dinners.
Ingredient List
Here are the ingredients that you will need for this Medieval Chicken in a Clay Roaster Recipe:
- 1 whole roasting chicken (4-5 pounds)
- 1 onion, quartered
- 4 garlic cloves, minced
- 2 tablespoons unsalted butter, softened
- 2 teaspoons fresh rosemary, chopped
- Salt and freshly ground black pepper
- 1/2 cup white wine
As for the equipment, you will need a clay roaster to cook the chicken. A clay pot or Polish pottery apple baker can also be used. However, make sure to follow the clay roaster recipe to get the same results.
The Recipe How-To
Now that you have all the ingredients, it’s time to create a medieval masterpiece in your very own kitchen.
Prepping the Chicken
First, preheat your oven to 350°F.
Remove the giblets from the chicken and rinse it inside and out with cold water. Pat it dry with paper towels.
Rub 2 teaspoons of salt and 2 teaspoons of black pepper all over the chicken, making sure to get some inside the cavity as well.
Next, heat 4 tablespoons of unsalted butter in a skillet over medium-high heat. Add the finely chopped onion and 3 cloves of minced garlic, sautéing until they are softened, for about 5 minutes.
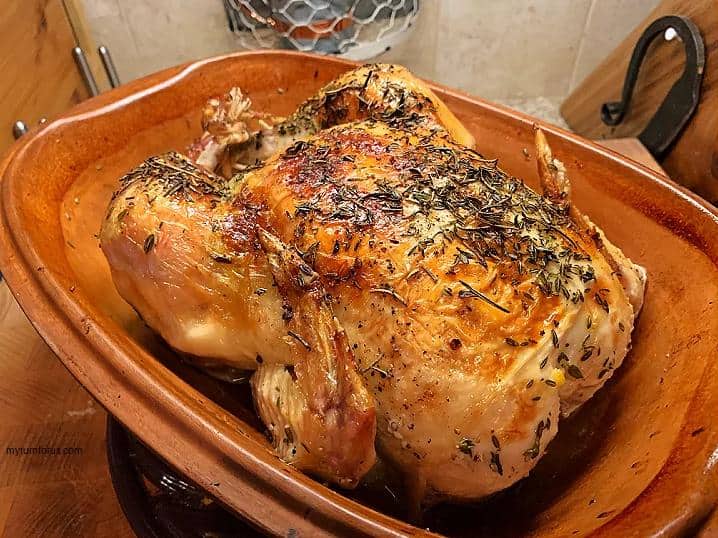
Add in roughly chopped fresh rosemary (about 1 tablespoon) and cook for another minute until fragrant. Then pour in a 1/2 cup of white wine, scraping up any browned bits from the bottom of the skillet.
Roasting Chicken Medieval Style
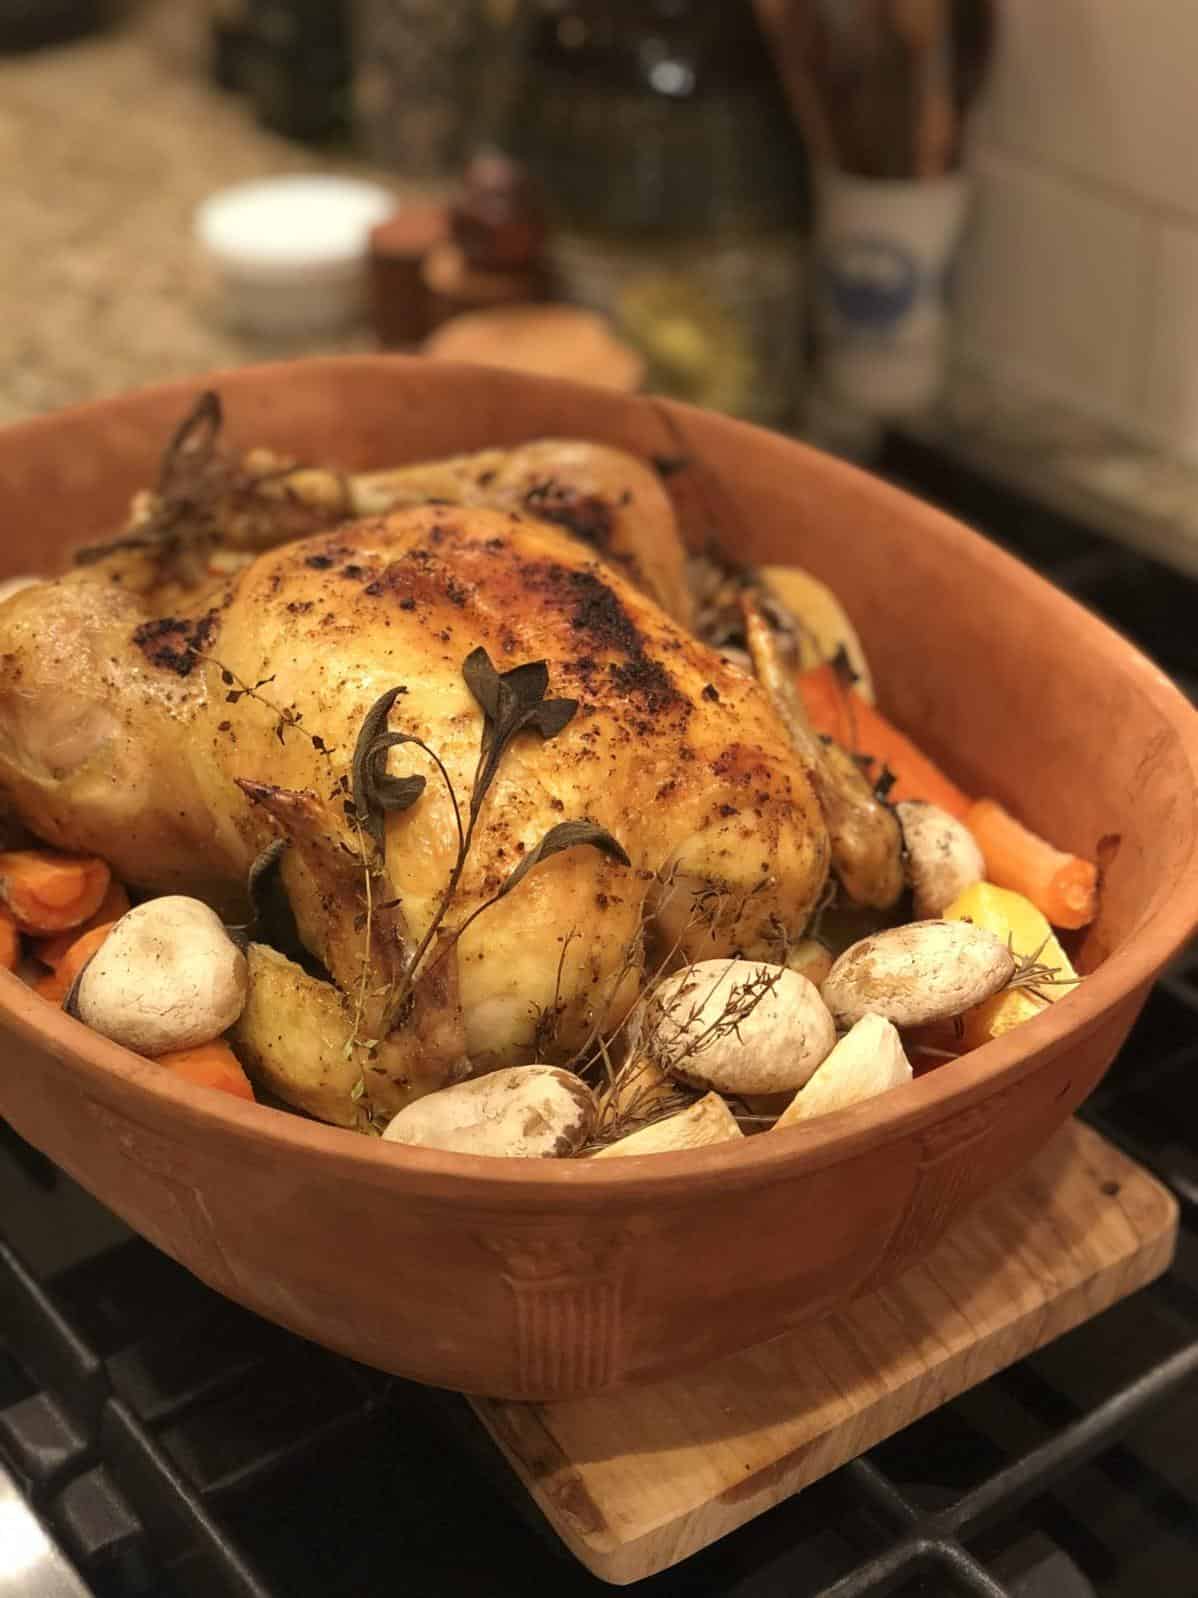
Now it’s time to place your medieval-style roasted chicken in a clay roaster.
First, soak the roaster in cold water for about 15 minutes. This will prevent cracking when placing it in a hot oven.
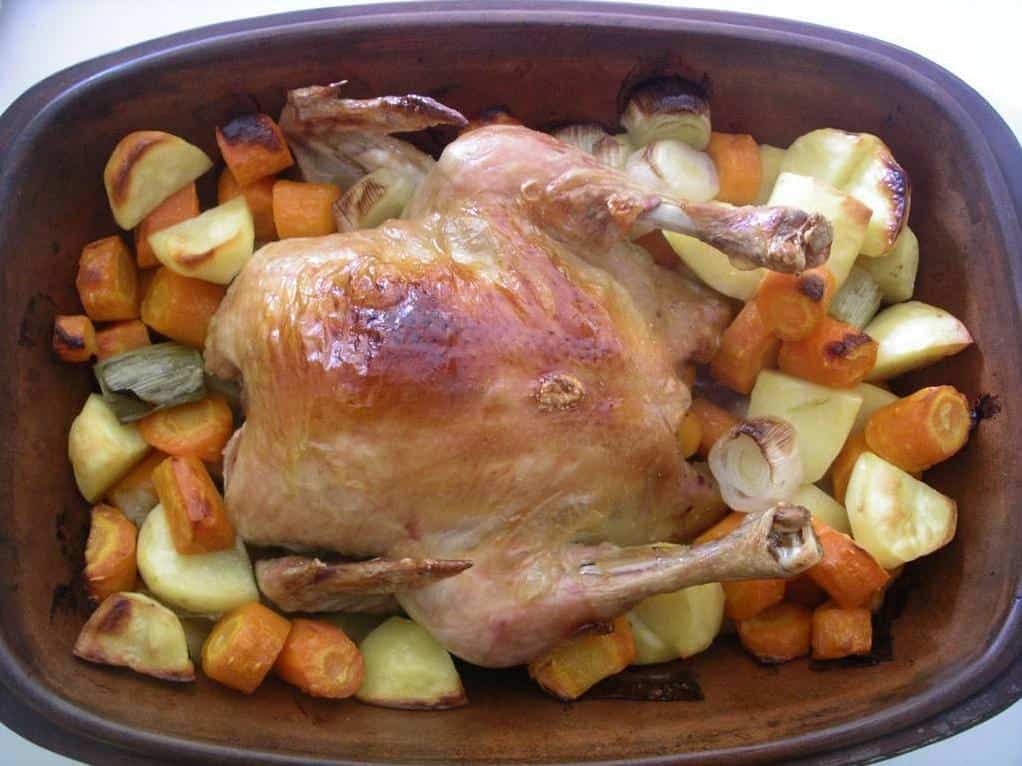
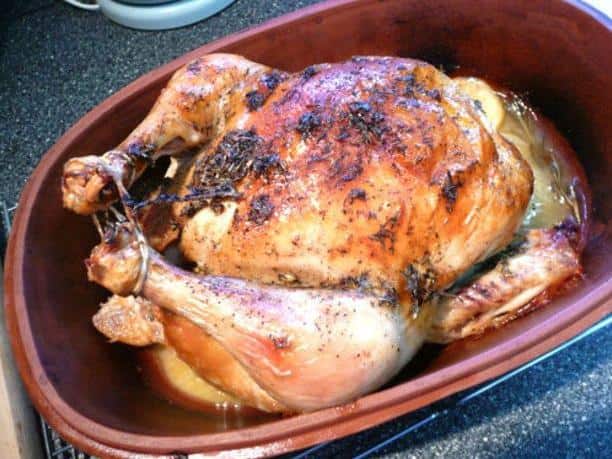
Add half of the onion mixture into the chicken cavity, then place it breast side up in the clay pot. Pour the remaining onion mixture on top of the chicken.
Cover the roaster with its lid and place it in your cold oven. Then turn up the heat to 450°F.
Bake your medieval chicken for an hour and a half or until its internal temperature reaches 165°F at its thickest part.
Adding Special Touches
If you want to give your medieval chicken a special touch that stands out, you can add either Salsa Camellina or Hot Honey on top before covering it again.
Both options work great if you’re looking for something extra spicy-sweet to add flavor to your dish!
Carving Your Chicken
Once your medieval-style roast chicken is done, let it rest on a cutting board for at least 10 minutes before carving it.
This will help retain all those delicious juices while making it easier and safer to handle!
Presentation
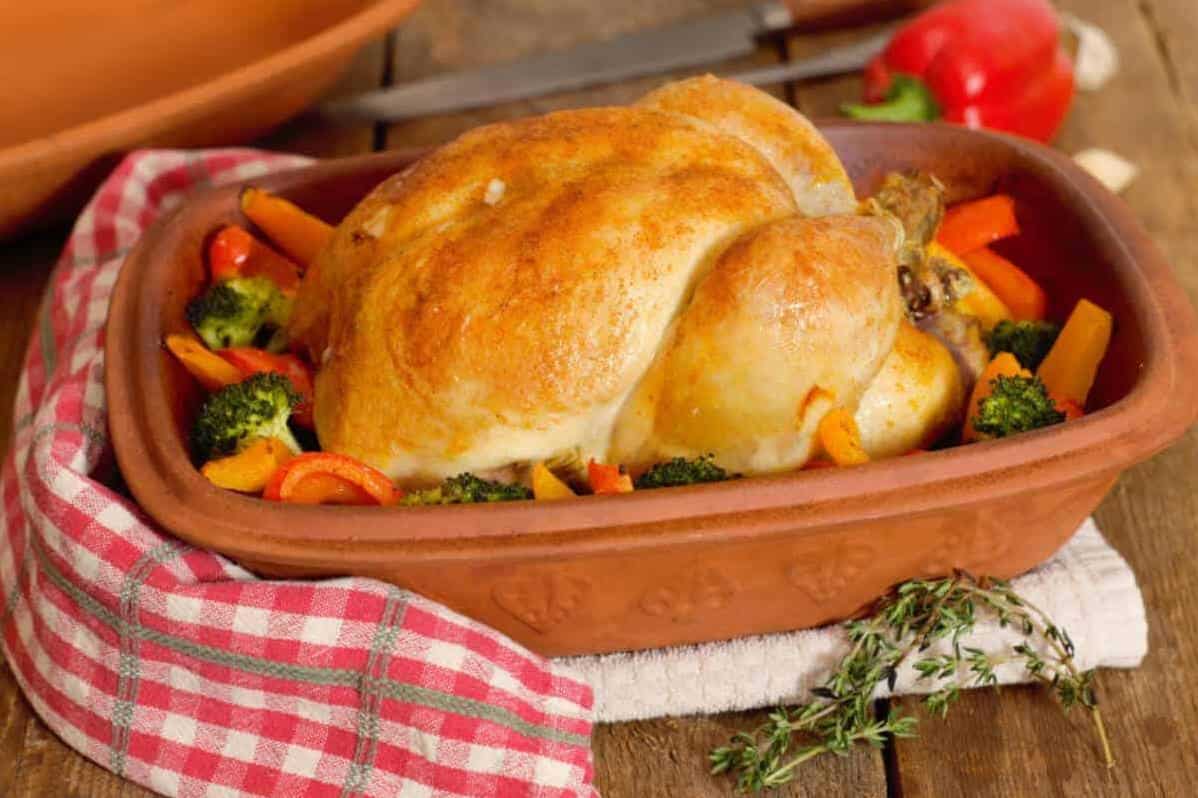
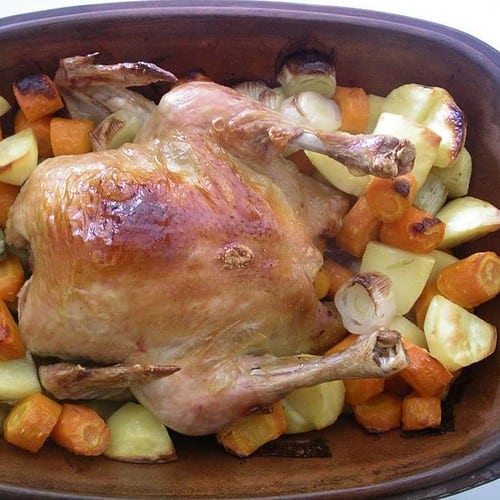
Serve your carved chicken with some freshly sliced fruit such as apples or pears as an accompaniment. You can also pair it with some roasted potatoes, mixed greens salad or any other side dish desired.
Enjoy this outstanding dish inspired by medieval times!
Substitutions and Variations
Don’t feel restricted to the exact ingredient list. Cooking is all about experimenting and finding what works for you. Here are some possible substitutions and variations for this recipe that can help you expand your horizons and create a dish that matches your taste preferences.
– White wine: If you don’t have white wine or don’t consume alcohol, you can substitute it with chicken broth or apple cider vinegar.
– Fresh rosemary: This recipe calls for fresh rosemary, but if you don’t have access to fresh herbs, dry rosemary works just as well. In addition, thyme or oregano would be an excellent substitution for rosemary, depending upon your preference.
– Onion and garlic cloves: The flavor profile of onion and garlic cloves is an essential component of this recipe. However, if you’re allergic to both or want to follow a low FODMAP diet, consider substituting them with leek or garlic-infused oil.
– Butter: Unsalted butter enhances the flavor of this dish. But, if butter isn’t suitable for your dietary needs, you can use ghee (clarified butter) or coconut oil instead.
– Chicken: Roasting a whole chicken creates a stunning presentation piece. However, if you prefer chicken breasts or thighs over a whole chicken, ensure to adjust the cooking time accordingly.
– Clay pot/roaster variation: This recipe is designed for cooking in a traditional clay roaster. However, if it isn’t available to you, using a Dutch Oven or Romertopf clay cooker will produce similar results.
– Salsa Camellina variation – An excellent addition to this dish includes serving the roasted chicken with homemade Salsa Camellina sauce. This delicious sauce originates from medieval times served with roasted meats such as lamb and venison.
Experimenting with these substitutions and variations will make your final product unique and personalized to your taste preferences. Nonetheless, always ensure to maintain consideration to any dietary limitations and needed modifications.
Serving and Pairing
Now that you have cooked a delicious medieval chicken in your clay roaster, it’s time to serve and pair it with the perfect accompaniments. This dish is perfect for a dinner party, family gatherings, or just an elevated weeknight dinner.
When it comes to serving, you can either carve the chicken at the table or separately plate each serving, depending on your preference. I personally love carving the chicken at the table as it adds a nice touch of flair to any gathering, but both ways are equally delicious.
For pairing, I recommend serving this chicken with some simple sides like garlic roasted potatoes or sautéed vegetables such as carrots, zucchini, and bell peppers. Any green salad with a light vinegar-based dressing would also work well here as it complements the richness of the chicken.
To complement the flavors of this dish, consider serving a bottle of white wine such as Chardonnay or Sauvignon Blanc. These wines are light and crisp, which will balance out the savory flavors in this dish.
If you’re looking for a non-alcoholic option, a refreshing iced tea with a hint of citrus will do just fine. You could also try pairing it with apple cider or sparkling water infused with lemon and mint leaves.
No matter what you choose to serve alongside this medieval chicken in your clay roaster, one thing is certain: your guests will be thoroughly impressed with your culinary skills!
Make-Ahead, Storing and Reheating
Now that you have made the most succulent medieval chicken in a clay roaster, it’s time to think about making it ahead and storing it properly to preserve its flavors. You can make this dish a day or two in advance and that will save you tons of time on your big feast day. Simply follow the recipe below until step 6 of the recipe instructions, then let it cool completely, wrap it tightly with cling wrap, and refrigerate for up to three days.
If you have leftovers from your medieval chicken dinner, which is a rare occurrence, just store them immediately in an airtight container or Ziploc bag and refrigerate for about three to four days. To reheat the chicken, take it out of the fridge and let it sit at room temperature for 15-20 minutes before reheating. Reheating in the oven is recommended as it brings back some firmness to the meat, but reheating in the microwave works just fine too.
It is important to note that chicken thighs usually reheat better than chicken breast because they have more fat content. If you want to keep your medieval chicken moist and flavorful after reheating, simply drizzle some hot honey over it. Believe me when I say that every bite will be like rediscovering medieval times!
Tips for Perfect Results
If you want to achieve mouth-watering results with your medieval chicken clay roaster recipe, follow these tips to the letter. These suggestions will make all the difference in terms of how your bird tastes and smells.
Firstly, ensure that you use fresh rosemary for this recipe. Nothing beats the aroma of fresh herbs that you can pick from your garden or get at a farmer’s market. Pungent, healthful rosemary imparts an ambrosial flavor while balancing out the rich sauce’s creaminess. Fresh ingredients are the key to creating a delicious dish that is full of flavor.
Secondly, always use unsalted butter. This ingredient adds depth to the flavors and keeps the chicken meat moist and juicy as it cooks in the clay roaster. Unsalted butter has a unique taste that doesn’t compete with other seasonings but rather enhances their flavor profile.
Thirdly, invest in a high-quality clay pot or pottery apple baker. Clay pots are perfect for low and slow cooking because they have natural insulating properties that distribute heat evenly. You can buy genuine Romertopf roasters or modern replicas that perform equally well. Some modern pots even come with glazed finishes that make them easier to clean.
Fourthly, when stuffing the chicken with garlic cloves, onions or any herbs, do not fill it too tightly, or else it won’t cook through evenly. Leave some space inside so the hot air can circulate around and permeate throughout its flesh. Better still; try to tuck garlic cloves under the skin instead of inside to prevent burning.
Fifthly, for a golden brown hue on your roast chicken hot honey or medieval chicken with salsa camellina sauce, brush olive oil on its surface before roasting uncovered. Although optional, this trick works wonders even in a cold oven because it helps sear meat juicily.
Finally, Let your clay pot cool after removing it from the oven fully before cleaning it finally. Never run it under cold water right away as this can cause thermal shock that may damage the pot’s integrity and durability over time.
With these tips in mind, making an appetizing medieval chicken clay roaster recipe will be easy-peasy-lemon-squeezy!
FAQ
As we come to the end of this recipe article, let’s answer some frequently asked questions that will help you prepare this medieval chicken dish with ease for your next dinner party. These questions cover everything from substitutions to leftovers and can save you time and effort in the kitchen. So, read on and get ready to impress your guests with an old-fashioned yet delicious feast!
How did they cook chicken in medieval times?
In ancient times, the primary way of cooking chicken and other meats was to boil it initially. If the meat was whole, it was first soaked in boiling water, stripped of its feathers, cleaned, and made ready for additional cooking. After that, it was put into water and heated until it boiled. Later on, the surface liquid was removed. This technique was prevalent in medieval cooking processes.
How do you cook in a clay roaster?
Looking to cook a delicious meal? The clay baker is an excellent option for you! Firstly, make sure to soak the pot in water. Then, add any ingredient you desire – meat, vegetable, poultry, seafood, fruit – with ease. Place the pot in the oven and wait for 45 minutes while the clay absorbs the water, creating steam that will cook your food to perfection. Trust me, this method will guarantee you a savory and juicy meal.
How do you cook with a Schlemmertopf?
Let me tell you one of my secrets to creating a delicious and juicy beef dish that never disappoints. First, preheat the oven to 375°F and place the Schlemmertopf in it while it’s still cold. Let it cook for approximately 30 minutes until it warms up inside.
After that, add the hot beef broth and a dash of wine to the pot. I like to add a few slices of bread on top of the beef to soak up the flavorful juices. Don’t forget to sprinkle some grated cheese on top of the bread for extra cheesiness!
Lastly, return the dish back to the oven and bake it uncovered for another 20 minutes until the cheese has melted and the bread is crispy. Trust me, the Schlemmertopf retains all the flavors that a usual pot wouldn’t have, making the beef so tender and succulent that it will undoubtedly leave a lasting impression on your guests.
Bottom Line
In conclusion, this Medieval Chicken in a Clay Roaster recipe is an absolute must-try for anyone who loves hearty and flavorful meals. It brings the taste of medieval times to your modern-day kitchen with its unique method of cooking in a clay pot. The combination of white wine, fresh rosemary, onion, garlic, and unsalted butter creates a savory and aromatic flavor that will tantalize your taste buds.
This recipe is versatile enough to make substitutions and variations depending on your preferences or any dietary restrictions you may have. It requires minimal preparation and can be made ahead of time, stored easily, and reheated quickly without compromising flavor or texture.
Whether it’s a cozy dinner with loved ones or an elegant feast with friends, this Medieval Chicken in a Clay Roaster recipe will undoubtedly impress everyone at the table. Give it a try today and transport yourself to a different era with every delicious bite.
Medieval Chicken in a Clay Roaster Recipe
Ingredients
- 1 roasting chicken (large whole roaster, can substitute cornish game hens or smaller roasters)
- salt and pepper, to taste
- 4 tablespoons unsalted butter, softened
- 2 -4 garlic cloves (minced fine)
- 1 onion, peeled and quartered
- 1 sprig fresh rosemary
- 1 cup white wine
- 1 cup orange juice
Instructions
- Soak the clay pot according to the manufacturer's instructions.
- Spatchcock the chicken, making sure to remove the keel bone and breast cartilage, but not cutting the bird into halves. Rinse.
- Season the chicken inside and out to taste with the salt and pepper.
- Combine the softened butter and the minced garlic. The amount of garlic should be adjusted based upon your preference.
- Using your fingers, spread the garlic butter between the meat and the skin of the breast and leg meat.
- Wrap the chicken around the quartered onions and fresh rosemary and place in the prepared clay pot.
- Pour the white wine and the orange juice over the prepared bird, allowing the excess liquid to pool at the bottom of the pot.
- Place covered clay pot in COLD oven and turn the heat on to 450 degrees. Bake until the chicken is cooked (use an oven thermometer) through, checking often after the one hour mark. The time will vary based upon the size of the bird(s). (In our oven, baking time is typically between 75 and 90 minutes.).
- As the bird gets close to being done, take the cover off the pot and allow it to brown.
- Allow the chicken or hens to cool for 10 minutes in the pot with the juices after removing from the oven. Collect the juices and skim off as much fat as possible.
- Cut up and serve the bird with some of the lovely skimmed juice on the side. Thicken it if you want, but we like it just as is.
Your Own Notes
Nutrition
Recommended Recipes Just For You

Anna is a culinary expert who specializes in grilling delicious BBQ dishes. She also enjoys sharing her recipes and experiences with her foodie community on her blog. She’s the total package for any backyard barbecue!